Shopping List
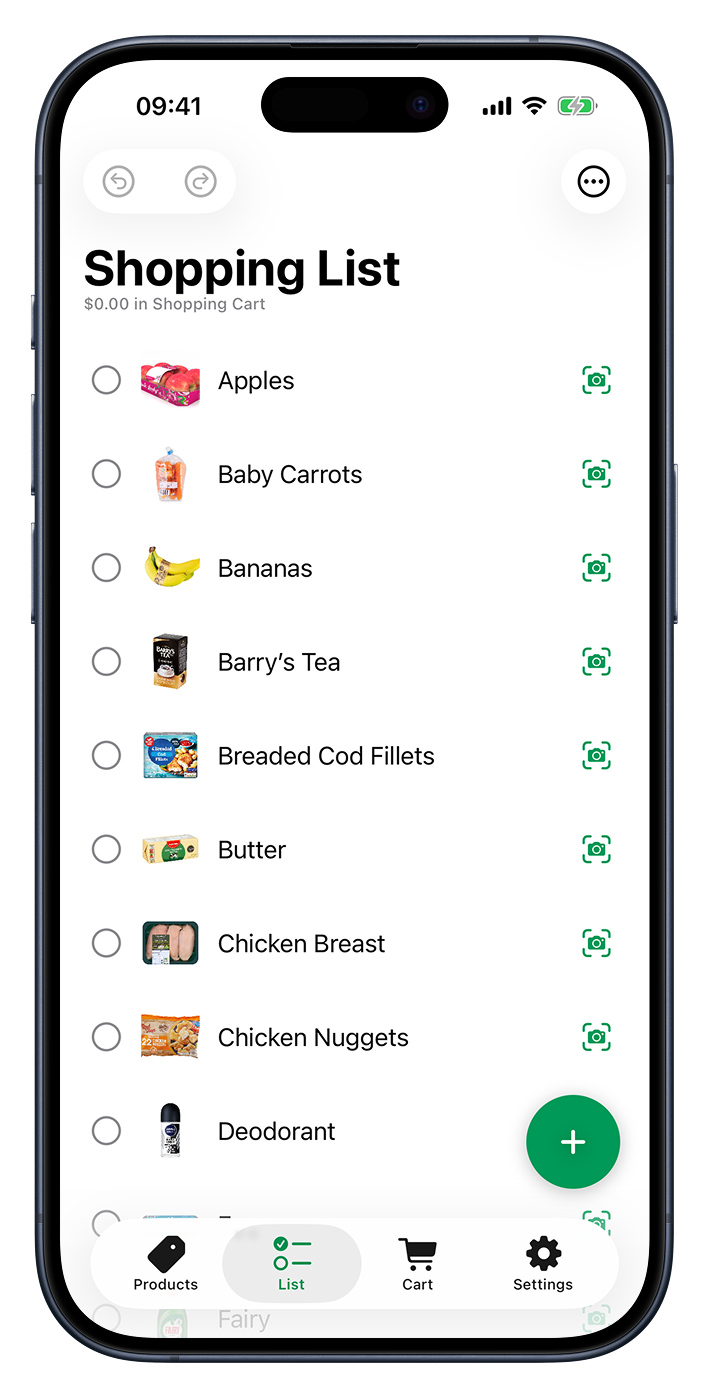
The Shopping List is where you plan a trip. Jot down everything you need before you head out, then tick items off one by one as you drop them in your basket — so you always know what’s left to grab.
You can build a list from the products you’ve already saved or just type things in as they come to mind. There’s nothing to set up: open the tab and start adding.
Adding items
There are two easy ways to get something onto your list:
- Type it in. Tap the plus button in the bottom corner (or the New Item row at the bottom of the list) and start typing. Press return to add it and keep going — handy when you’ve got a few things to jot down in a row.
- Send it over from your products. On the Products screen, swipe a saved product to the right to drop it straight onto your list. Items added this way bring their photo along, so they’re easy to spot.
Ticking items off
As you shop, tap the circle on the left of an item to check it off. Checked items get a tick, a line through their name, and slide down to the bottom of the list — so the things you still need stay up top where you can see them.
Changed your mind? Tap the circle again to bring it back. And if you tick something off by accident, the undo button in the top-left corner puts it back; the redo button next to it reapplies it.
Setting a quantity
Buying more than one of something? Swipe an item to the right and tap Quantity to choose how many you need. Step the number up or down, or tap one of the five quick shortcuts — 1, 3, 5, 10 and 12 to begin with, and you can change them to any numbers you like under Quantity Picker in Settings. The item then shows a small Qty. badge so the count is clear at a glance.
Scanning a price while you shop
Every item has a small camera button on the right. Tap it while you’re standing in the aisle to scan the price tag — Cartsy reads the price, adds the item to your Shopping Cart, and ticks it off your list in one go. There’s more on reading prices in the Price Scanner section.
Removing an item
To take something off the list, swipe it to the left and tap delete.
Sorting and grouping
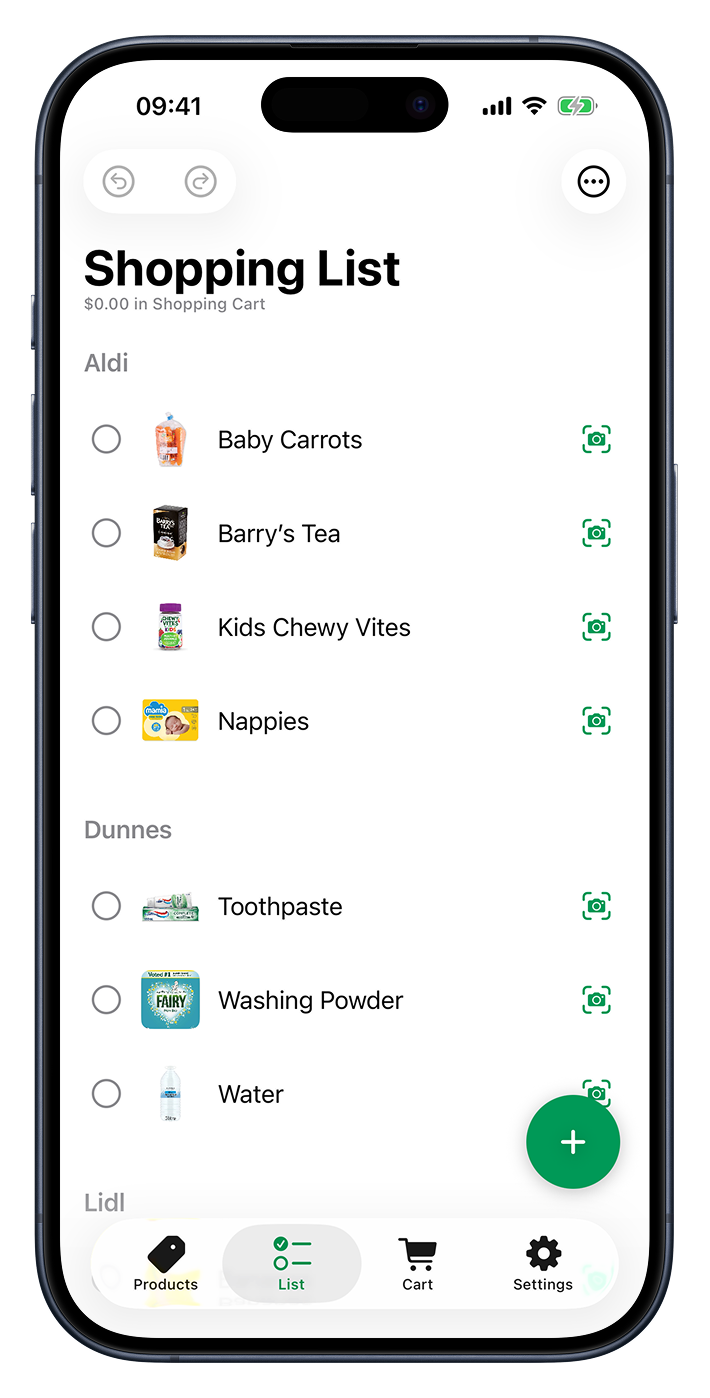
Tap the menu button in the top-right corner to change how your list is laid out:
- Sort your items alphabetically, either A–Z or Z–A.
- Group by Shop gathers your items under the shop where you usually buy each one, so the list is already sorted by aisle before you arrive. Anything that isn’t tied to a shop is collected under Other Items. You set a product’s shop on the Products screen — see Shops for more.
Tidying up completed items
The same menu helps you keep a long list under control:
- Hide Completed tucks away everything you’ve already ticked off, leaving just what’s left to get. Choose Show Completed to bring them back.
- Clear Completed removes all the ticked-off items at once, clearing the clutter while keeping the things you still need. Cartsy checks with you first.
Starting a fresh list
When a shop is done — or you simply want a clean slate — open the menu and choose Delete All Items. Cartsy asks you to confirm, then clears the whole list so it’s ready for next time.
Keeping an eye on the count
Just under the Shopping List title, Cartsy shows how many items are on your list. If you’d rather see your running cart total there instead, you can switch that on with Show Cart Total in Shopping List in Settings.